Cutting Worksheets That Beat Boring Straight Lines

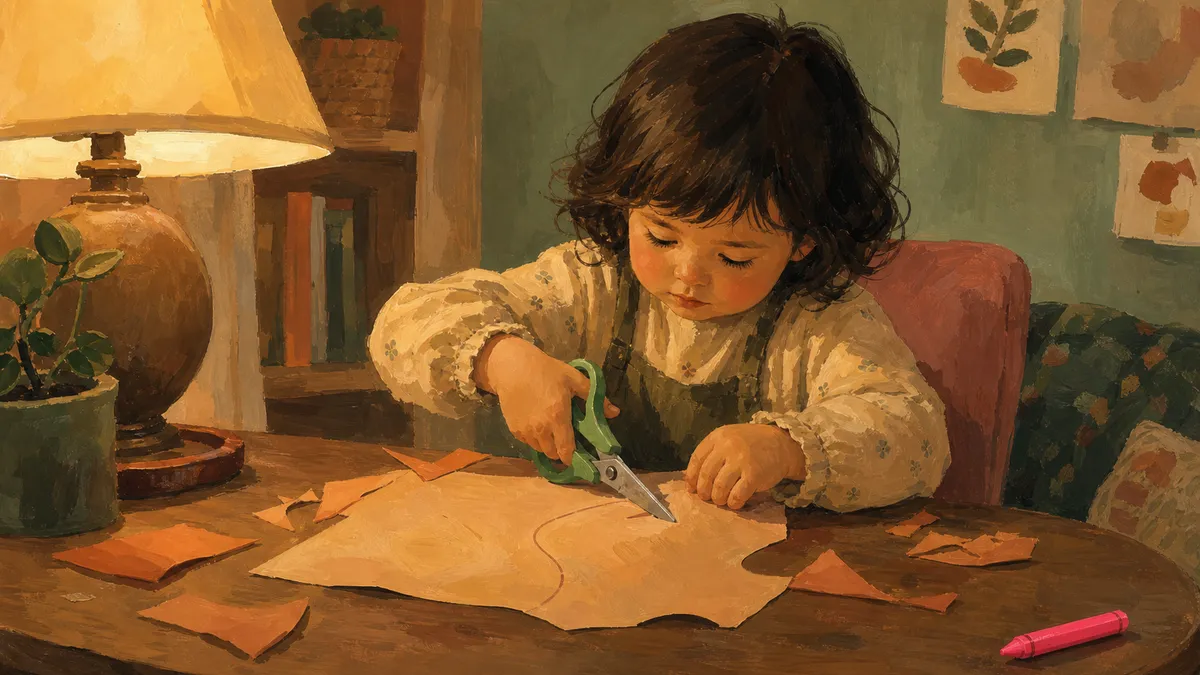
Hand your preschooler a 1-inch fringe strip first, let them snip the fringe off in single chops, then build up through wavy, zigzag, curves, and shapes before any real worksheet. I’m Nora Hayes, a former preschool aide who has run cutting practice with my own two and a living-room group of kids who learn differently, and the order matters more than the page does.
Below you’ll find the snip-and-cut activities and cutting worksheets that carry a kid past dull straight lines, plus the swaps that keep little fingers engaged when the worksheet loses its appeal.
The plan in brief:
- Start with single snips on 1-inch fringe strips before any line.
- Progress straight to wavy to zigzag to curves to shapes, holding each one for a week.
- Swap paper for playdough ropes and food when the worksheet gets boring.
How to Introduce Scissors Before the First Worksheet
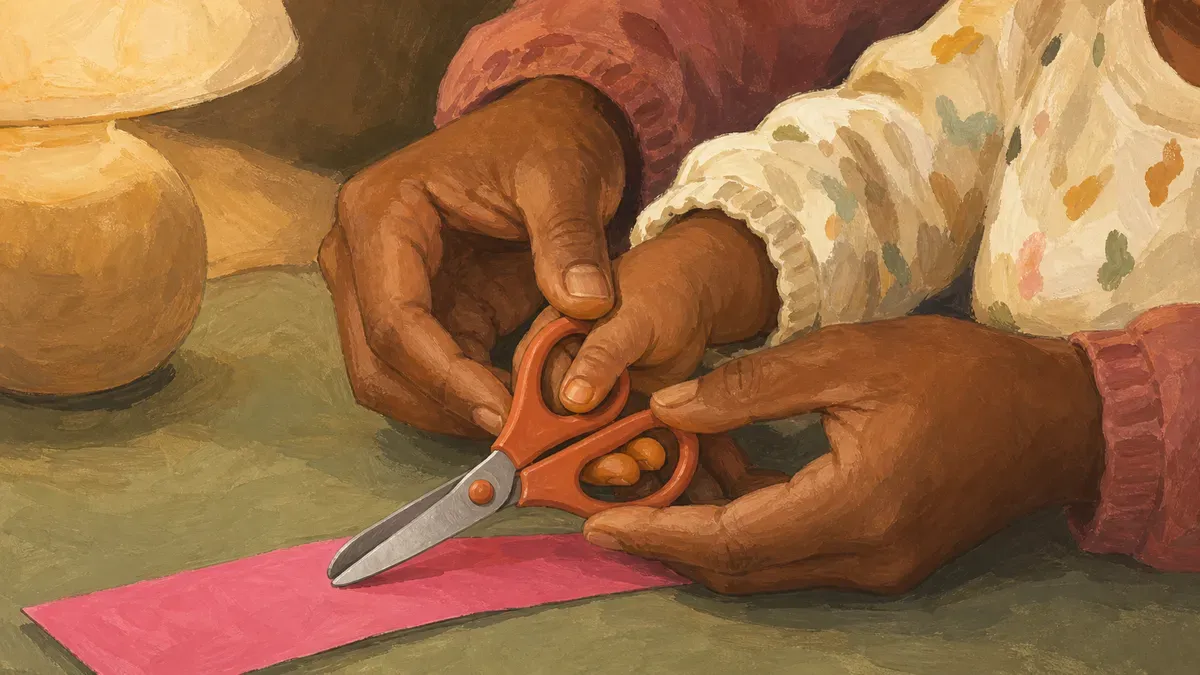
Before any worksheet touches the table, two things need to happen: your kid holds the scissors safely, and they feel the open-close motion succeed. Get those right and the rest follows.
- Get the grip right: thumb up, correct loop placement, and the right pair of scissors for their dominant hand.
- Practice single snips on a card-stock strip before ever touching a line on paper.
- Build repetition until they can snip a whole strip without stopping to readjust.
Set Up the Grip and Hand Position
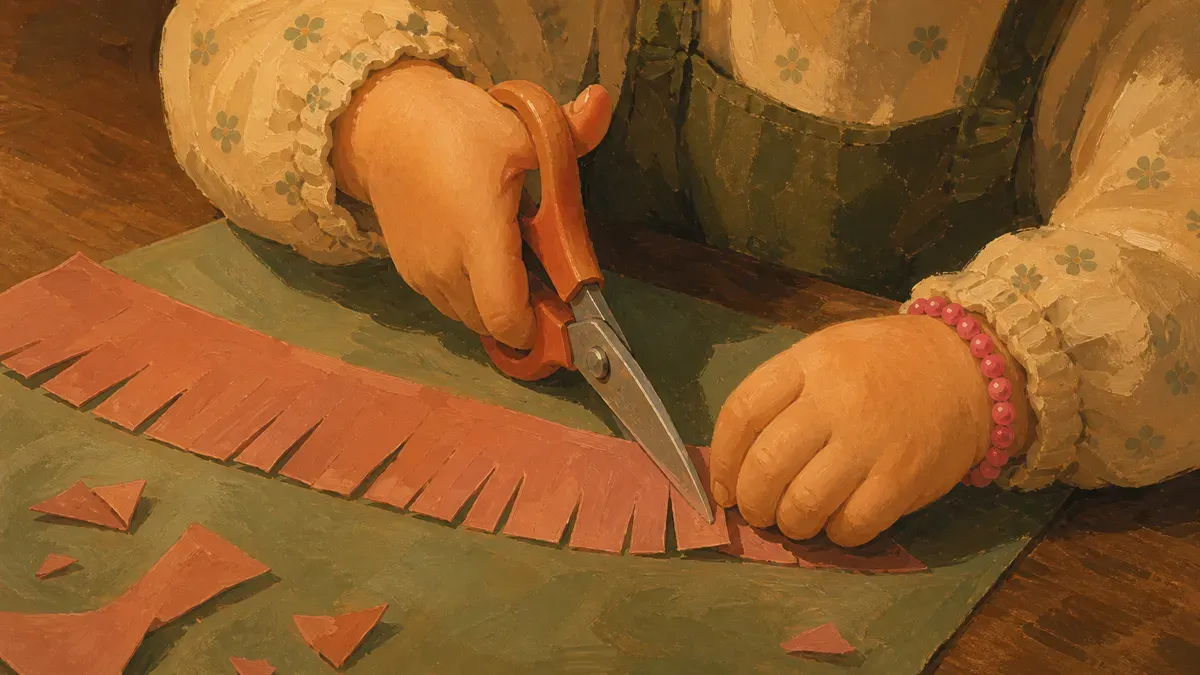
Three things make up a solid grip: That keeps the blades aligned so they cut instead of crumpling.
- Fingers in the right loops. One or two fingers in the larger loop is standard. For a child with weaker hand strength, The OT Toolbox recommends slipping both the index and middle fingers through the large loop for more grip control.
- Left-handed kids, left-handed scissors. A proper left-handed pair reverses the blade. A lefty using right-handed scissors pushes the paper away instead of cutting it.
The helper hand holds the paper steady, a couple of inches from where they’re cutting. If they’re fighting the paper instead of the scissors, the safety scissors may also be too large for their hand. Good scissor skills start with the right fit, not the prettiest pair in the store.
Warm Up With Single Snips
Once the grip looks right, skip the line on paper entirely. That’s the whole first exercise for preschool cutting practice.
Build the motion before asking them to follow a line.
Repetition on something easy is the point. When they can snip the whole strip without stopping to adjust their grip, they’re ready for a line.
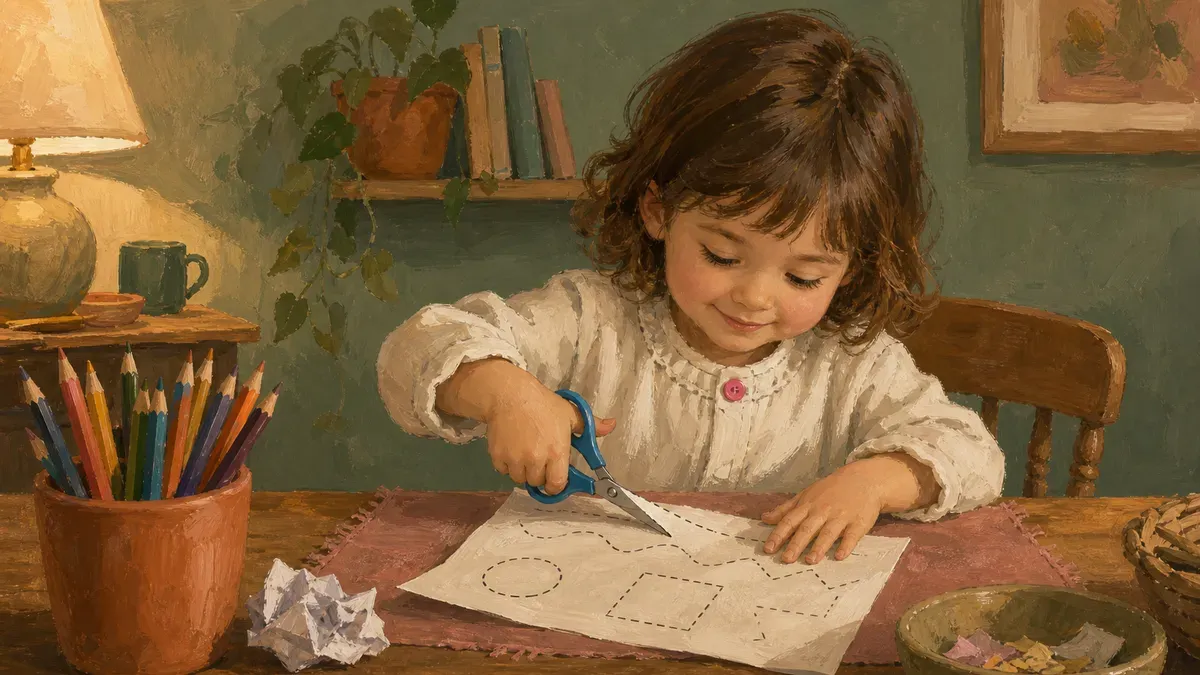
The Cutting Line Progression Kids Actually Follow
Once they’ve got snipping down, lines come next, and the order matters more than most cutting practice pages suggest.
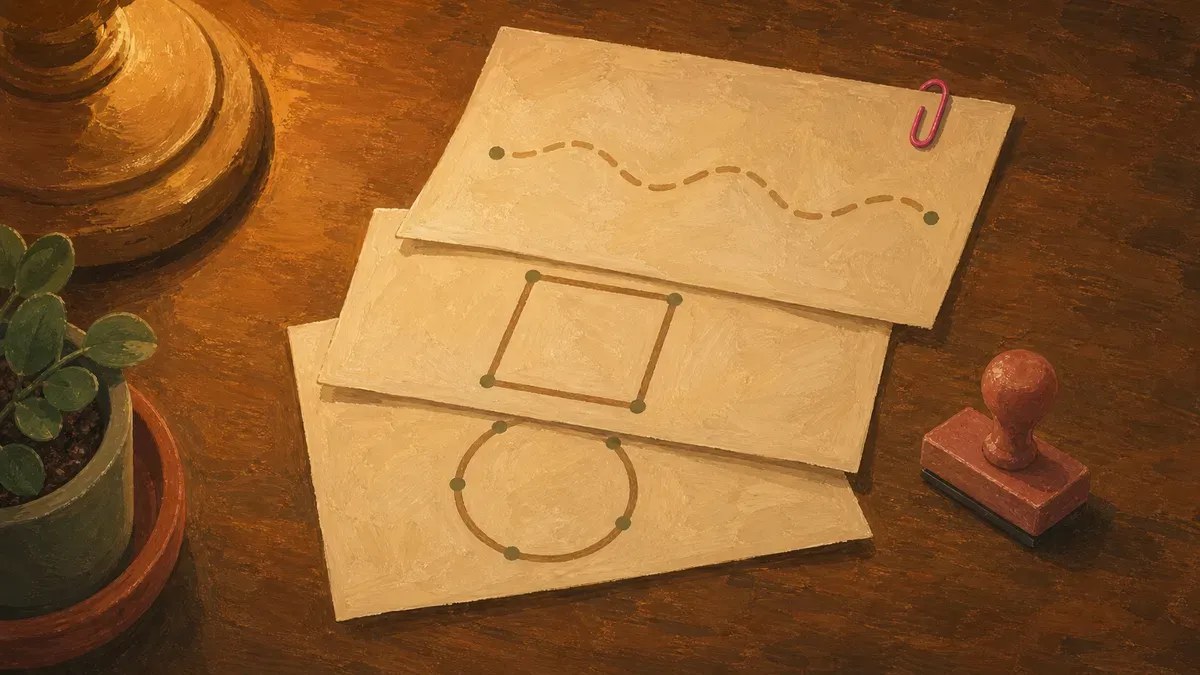
Straight, Wavy, and Zigzag Lines
Straight lines come first because they only ask for one skill: moving forward.
Once they can follow a straight path without drifting, introduce a wavy line. Gentle curves teach the hand to make small continuous adjustments, which is a different demand than cutting straight. After wavy lines feel easy, zigzags add something new: deliberate stops and direction changes.
For all three, use lines to cut that are clearly printed, at least a quarter inch wide, and bold enough that a 3-year-old can track them without squinting.
- Straight lines: move forward without steering or turning.
- Wavy lines: make small, continuous adjustments as the line bends.
- Zigzag lines: slow down, stop, and redirect at each corner.
- Spiral cuts and wide arcs: practice a curve that keeps bending.
- Closed shapes (square first): control where you start and where you stop; most kids hit this between 4.5 and 5.
- Circle: no corners to signal a turn; wait until corners are solid.
- Complex shapes: combine curved and straight lines; typical around age 6.
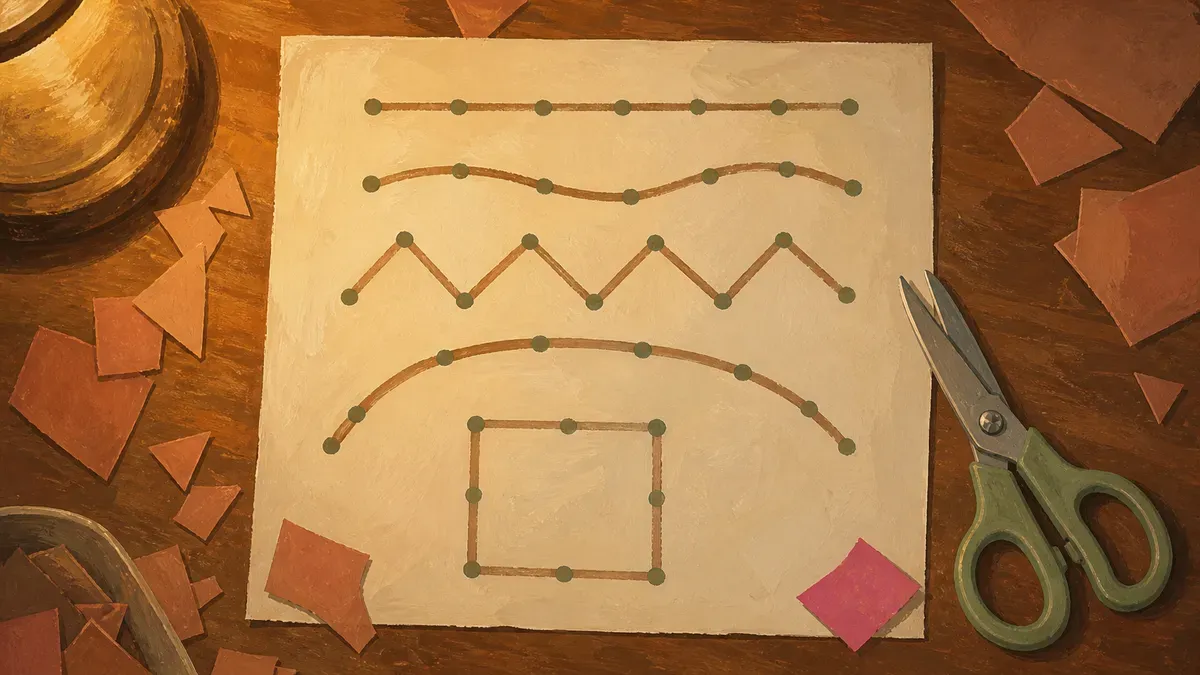
Curves, Corners, and Simple Shapes
Curved lines are harder than wavy ones because the curve keeps bending without a break.
- Ages 3.5-4.5: can cut a 6-inch line staying within a quarter inch of it, per NAPA Center research on fine motor readiness.
- Ages 4.5-5: can cut out a square within that same margin.
Cutting a square with tidy corners is the signal that kindergarten-prep worksheets are within reach.
- Square: corners tell the hand exactly when to turn.
- Circle: no corners, no warning, and harder than it looks.
By 6, most kids can handle complex shapes that mix curves and straight lines. Work cutting practice for preschoolers through that sequence and you’re building toward real kindergarten tasks.
15 Snip-and-Cut Activities Past Straight Lines
Worksheets get boring fast, and a bored kid puts the scissors down. So once the line progression is rolling, mix in the stuff that doesn’t live on paper at all, plus the themed games that trick them into more reps.
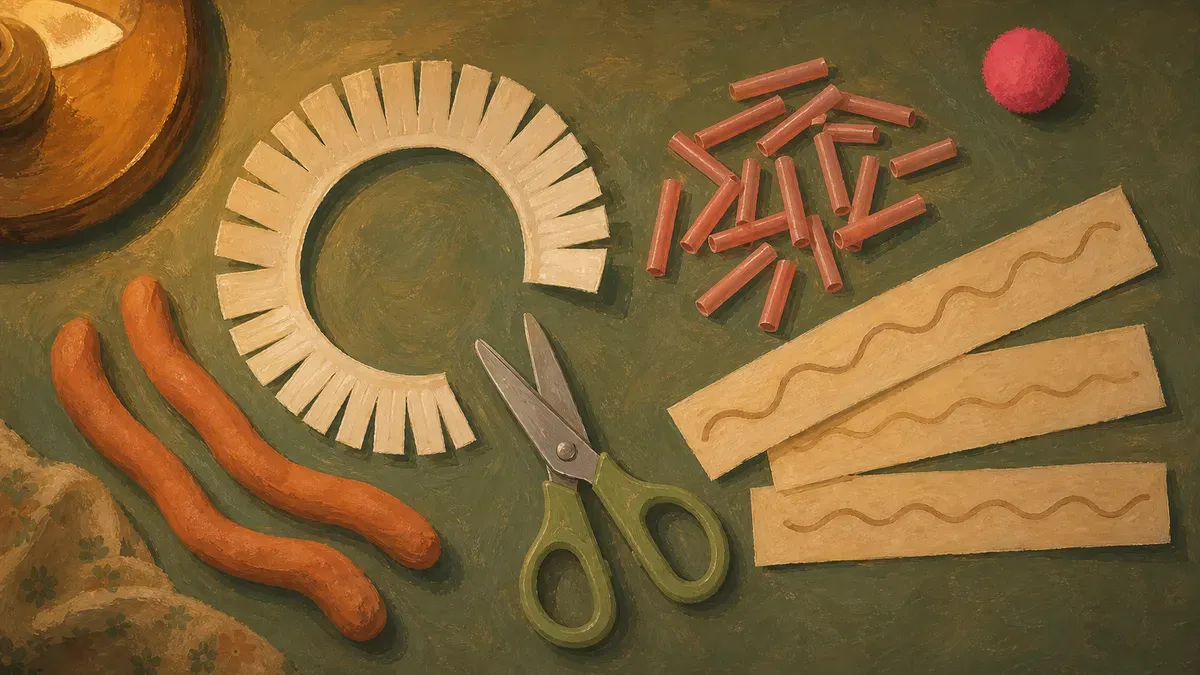
Beyond-the-Page Activities With Real Materials
The best first cuts aren’t paper. Occupational therapists recommend snipping playdough coils, yarn, drinking straws, and cooked spaghetti before paper, because those soft materials are forgiving and lower the resistance a weak hand has to push through to finish one open-close snip.
That opens up a whole pantry of cutting activities for preschoolers that feel nothing like homework:
- Roll playdough into fat ropes and let them chop coins off the end
- Snip drinking straws into a cup to shake like a rain stick later
- Fringe a lettuce or kale leaf for a pretend salad
- Cut yarn into short bits for gluing onto a card
- Snip cooked spaghetti into a bowl, piece by piece
- Cut the edge of a paper coffee filter into a fringe
- Trim the leaves off a fresh herb stem (basil works great)
These double as cutting activities for toddlers under close supervision, since natural materials forgive the wobbly, sideways snipping that frustrates a new cutter on a stiff worksheet. No printer, no prep, and most of it is already in your kitchen.
Themed and Pretend-Play Cutting
Give a snip a story and a kid will do it twenty more times. A kid who’s snipping spider legs or trimming pretend hair doesn’t feel the reps at all.
Draw a goofy face on a paper plate, fringe the top into wild hair, and hand over child scissors for a “haircut.” Scissor skills haircut worksheets do the same job on paper, with rows of hair to trim down. Add googly eyes and the face becomes a monster, fringe and all.
From there, cutting ideas for preschoolers turn into collage: cut shapes from old magazines or junk mail and paste a picture, no precision required.
- Trim spider legs in October, fringe a turkey’s tail in November
- Snip green strips into grass for a spring scene
- Cut and glue a paper-chain countdown to a birthday
- Snip tissue paper squares to fill a holiday wreath collage
- Cut heart shapes from red paper for a Valentine’s garland
Seasonal themes keep the same skill feeling new month after month. For ready-made pages that follow this build, my scissor practice worksheets carry the haircut and monster-fringe ideas straight to your printer. Rotate one new theme a week and the cutting never gets stale.
Choosing the Right Cutting Worksheet
Picking the wrong page is the fastest way to kill a kid’s momentum. Here’s how to match the sheet to where your child actually is.
Which Tier to Start From
Think of cutting activities in three tiers and match the right one to your child, covering the full range of cutting exercises preschoolers work through:
- Just starting out. Wide-spaced dashed straight lines, or the fringe-strip format from the previous section. These are your pre-k cutting worksheets. One snip or one straight pass is a full win.
- Ready for more. Wavy and zigzag cutting sheets and scissor exercises. A little direction-change, a little challenge. Still forgiving if the line wanders.
- Preschool cutting pages with shapes. Squares before circles, always.
If you’re not sure where your child lands, start one tier down. Confidence on an easier page builds faster than frustration on a hard one. These cutting sheets fit naturally alongside fine motor tracing handwriting scissor skills if you want to layer pencil practise into the same session.
For cutting practice, one focused activity sheet beats five half-finished ones.
Fixing Common Cutting Struggles
Even with the right progression, things stall. Here’s how to get them unstuck.
When the Cut Goes Off the Line
A wandering cut usually comes down to two things: the line is too thin to track, or the helper hand isn’t doing its job. For cutting practice for preschool-age kids, widening the line to half an inch solves more drift than any grip correction will.
The helper hand is trickier. Empowering OT Resources notes something counterintuitive: a child pressing paper flat on the table actually signals weak bilateral coordination, not inattention. Thumb on top, fingers underneath, paper held slightly off the table gives the cutting hand real resistance to push against. That hand strength difference changes everything.
If cutting still drifts after a few sessions, or the scissors keep rotating sideways before the cut is half done, mention it to your pediatrician. Research on occupational therapy for preschoolers with developmental differences shows short-term OT intervention is effective at improving sensory-motor abilities, and an OT can assess bilateral coordination quickly.
Keeping a Bored or Resistant Child Engaged
Some kids zoom at the scissors from day one. Others go limp at the sight of a worksheet. The worksheet is rarely the problem; the stakes are. Preschool cutting practice lands better when there’s no pressure to finish and no right answer.
Try a few small adjustments:
- Cap the session at five minutes and stop before they want to
- Offer a real choice of theme: pizza shapes or dinosaur fringe, today’s call is theirs
- Count one snipping run down a strip as a full win and move on
- Swap in themed worksheets when confidence is low; harder lines can wait a week
Short, choice-driven sessions rebuild confidence faster than longer battles with harder material. See our complete fine motor and scissor skills guide for how to layer scissor cutting into a fuller routine once they’re ready.
Found this useful? Save it for the next rough afternoon.
Questions parents ask me about this
What cutting worksheets help preschoolers practice scissor skills?
Look for worksheets organized by skill level: single snips and fringe strips first, then straight lines, wavy lines, zigzag lines, and finally shapes like squares and circles. A good set lets you start one tier below where your child is comfortable so they build confidence before pushing into harder cuts. The snipping stage tends to arrive between two and a half and three. Straight-across cuts tend to arrive in a similar window, with simple shapes like squares usually following around four and a half to five. Past five and still struggling with basic lines, it's worth a conversation with an occupational therapist.
At what age should a child start using scissors?
Most kids are ready to try snipping around two and a half to three years old, and that window is exactly where you want to start meeting them, even with just a strip of paper or some playdough. A straight-across cut usually comes together somewhere in that same window, and cutting out simple shapes like squares tends to follow around four and a half to five. If your child is six and basic straight lines are still a struggle, bring it up with an occupational therapist.
What kind of scissors are best for preschoolers?
Spring-loaded safety scissors take the most strain off small hands because they open on their own after each snip. For a child just starting out, large-loop scissors give weaker fingers a two-finger grip that feels more secure. Left-handed children need true left-handed scissors, not the ambidextrous type, because the blade orientation controls how they see the cut line.
How do I teach a left-handed child to cut?
Start with the helper hand: is it steering the paper toward the scissors, or just holding it in place? Paper-steering accounts for half of line-following, so fixing that grip alone often resolves the drift. A thick marker line buys more room for error and knocks out frustration quickly. If wandering persists, pull back to fringe strips with no line to track and let the mechanics settle before returning to line work. Sit next to your child rather than across from them so they can copy your grip naturally. The helper hand holds the paper from the right side while the cutting hand works from the left, exactly the reverse of a right-handed child. Everything else about the progression stays the same: fringe first, then straight lines, then curves and shapes.
How long should a preschool cutting practice session last?
Five to ten minutes of focused cutting is plenty for most preschoolers, and stopping while they're still interested keeps the next session from becoming a battle. If your child is resistant or rebuilding after a rough stretch, keep it even shorter and let them pick the theme or the paper color. Ending on an easy win matters more than finishing the whole worksheet.
Are cutting worksheets better than cutting real materials?
Neither one beats the other on its own. Soft real materials like playdough, yarn, and straws are the right starting point because they need less hand strength and give immediate tactile feedback. Once a child can manage those, worksheets add the line-following challenge that transfers to classroom tasks. Rotating between worksheets and hands-on materials keeps the skill building without turning practice into a chore.
What should I do if my child won't follow the cutting line?
Check that the helper hand is moving the paper toward the scissors rather than staying still, because paper-steering is half of line-following. If the cut still drifts, a thicker marker line gives wandering scissors more room for error and helps take frustration off the table. If the cut still drifts, drop back to a fringe strip with no line to track, let the basic mechanics settle, and return to line work once confidence is back.
Written by
Nora Hayes
Mom of two and a former preschool aide. I share the screen-free sensory play and calm-down ideas I test at my own kitchen table, plus what the moms in my little meet-up swear by. A parent passing on what works, not a doctor or a therapist.
More about NoraKeep going
All Fine Motor-
 Fine Motor
Scissor Practice Worksheets: 10 Steps to Cutting
Most kids snip before they cut shapes. Use these scissor practice worksheets and 10 activities to build the skill step by step. Start today.
-
 Fine Motor
Activities to Build Fine Motor Skills With Pom Poms
The hand strength behind neat handwriting starts with play. Try 20 pom pom activities to build fine motor skills your kid will actually beg to do.
-
 Fine Motor
Fine Motor Skills Activity: 5-Minute Warm-Up Routine
A 5-minute fine motor skills activity warms up little hands before handwriting so letters come out neater. Grab the no-prep routine and start today.
-
 Fine Motor
Fine Motor Skills Games for Preschoolers: 9 Busy Bags
Tired of screens at restaurants? These fine motor skills games for preschoolers pack into a zip bag and travel anywhere. Grab the 14 setups.