Calm Down Corner Poster Ideas Kids Actually Use

I am a parent sharing what worked at my house, not medical advice. For anything to do with your child's development or sensory needs, talk to your OT or doctor.
I’m Nora Hayes, a former preschool aide, and calm down corner posters actually get used when they show three to five picture steps hung at a child’s eye level.
A kid in meltdown mode can’t read paragraphs, but they can follow a picture of a slow breath.
This guide walks you through what goes on the poster, how high to hang it, how to map the steps to the Zones of Regulation, picking by age, DIY versus printable, and teaching a child to reach for it without you standing there.
The plan in brief:
- Hang the poster at your kid’s eye level, 30 to 40 inches off the floor
- Show 3 to 5 visual calming steps, not paragraphs of text
- Laminate it and point to it before the meltdown, not during
What Goes on a Poster Kids Actually Use
Most posters fail because they’re built for the adult hanging them, not the kid melting down in front of them. Here’s what actually earns its spot on the wall, and why pictures win every time.
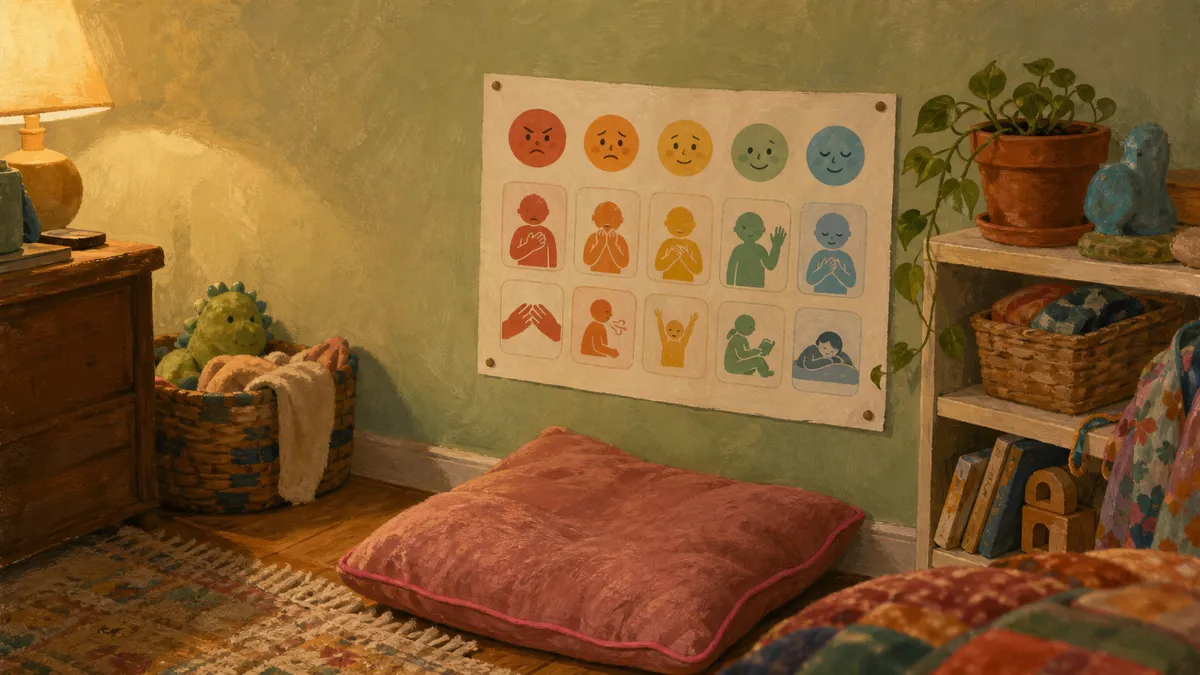
The Five Things Every Sign Needs
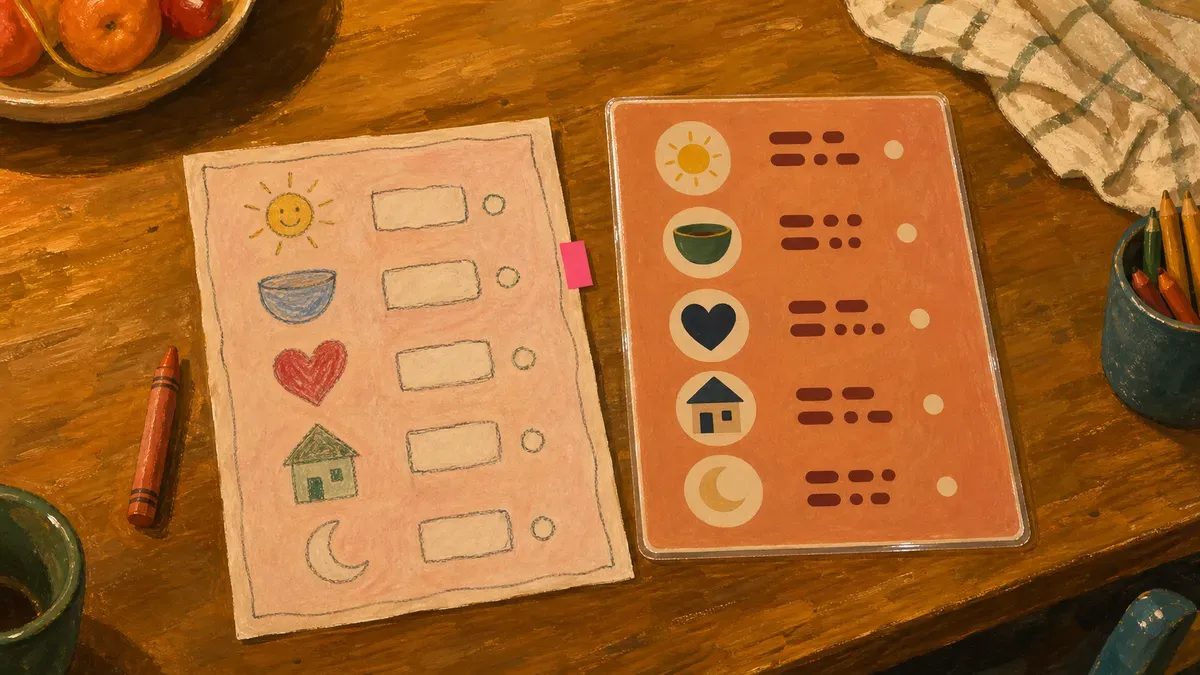
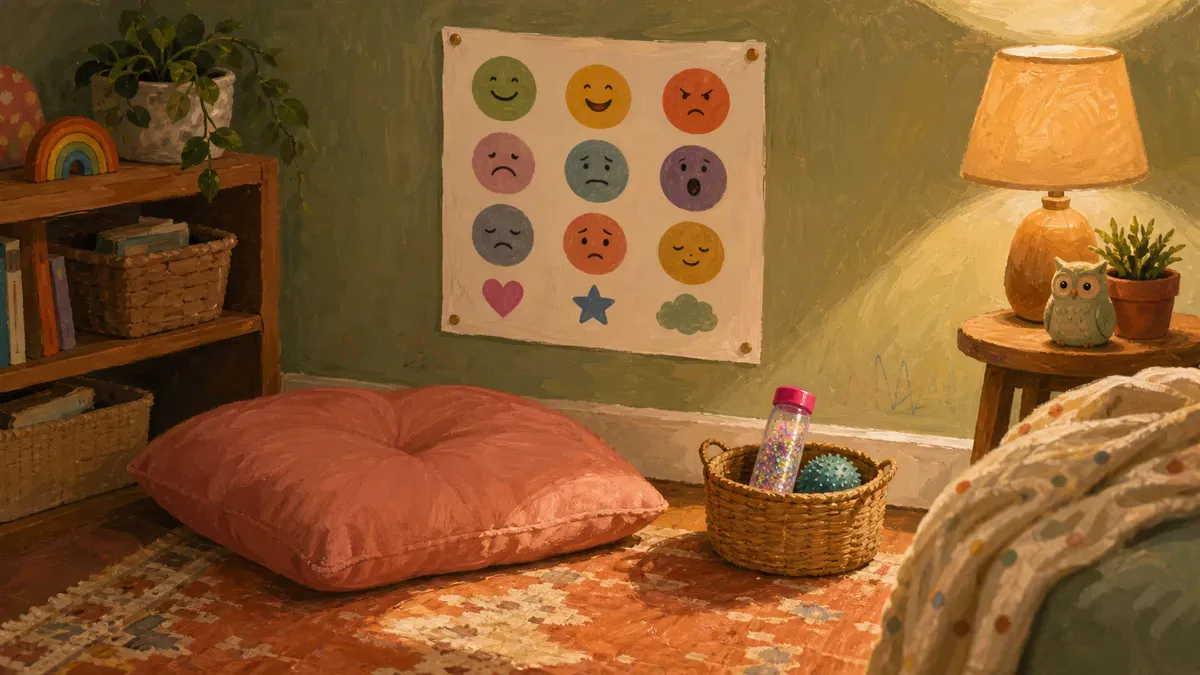
A calm down corner sign that a child reaches for has five parts, and not one of them is a wall of instructions.
- A feelings check-in. A thermometer or a row of faces, so the kid can point at “this is me right now” before they have words for it.
- Three to five visual calming steps. Breathe, squeeze, count, drink water. Enough to give options, few enough to scan in two seconds.
- Simple icons over text. One drawing per step. Words are backup, not the main event.
- A clear “when you’re ready” exit cue. A green check, a thumbs-up, a little door. Kids need to know how to leave, not just how to arrive.
- An emotions reference. A small chart of feelings so they can name it later, the part that quietly builds the skill.
![]()
The usual calm-down kit leans on these same pieces: a feelings thermometer, breathing visuals like box or star breathing, and calming strategy cards. If you want the full breakdown of what actually goes in a calming center, I’ve mapped every tool there. The poster is just the cliff-notes version on the wall.
Why Icons Beat Paragraphs
A kid in the red zone can’t read a paragraph. That’s not a guess, it’s how dysregulation works.
Autism Parenting Magazine notes that when children are dysregulated, verbal processing takes a hit, which is exactly why picture-based visual supports are the recommended format for calm-down materials, with written steps saved for kids who already read fluently. So lead with the drawing. One short word underneath, no more.
Readability matters more than you’d think for the little ones. Font size matters more than you’d think: a PLOS ONE study found second-graders scored lower on reading comprehension when text got small, so go big on the text and bigger on the icon.
- Big text, simple icons. No tiny labels a stressed kid has to squint at.
- High contrast only: dark icons on a pale background, not pastel-on-pastel.
- One word per step, two at most.
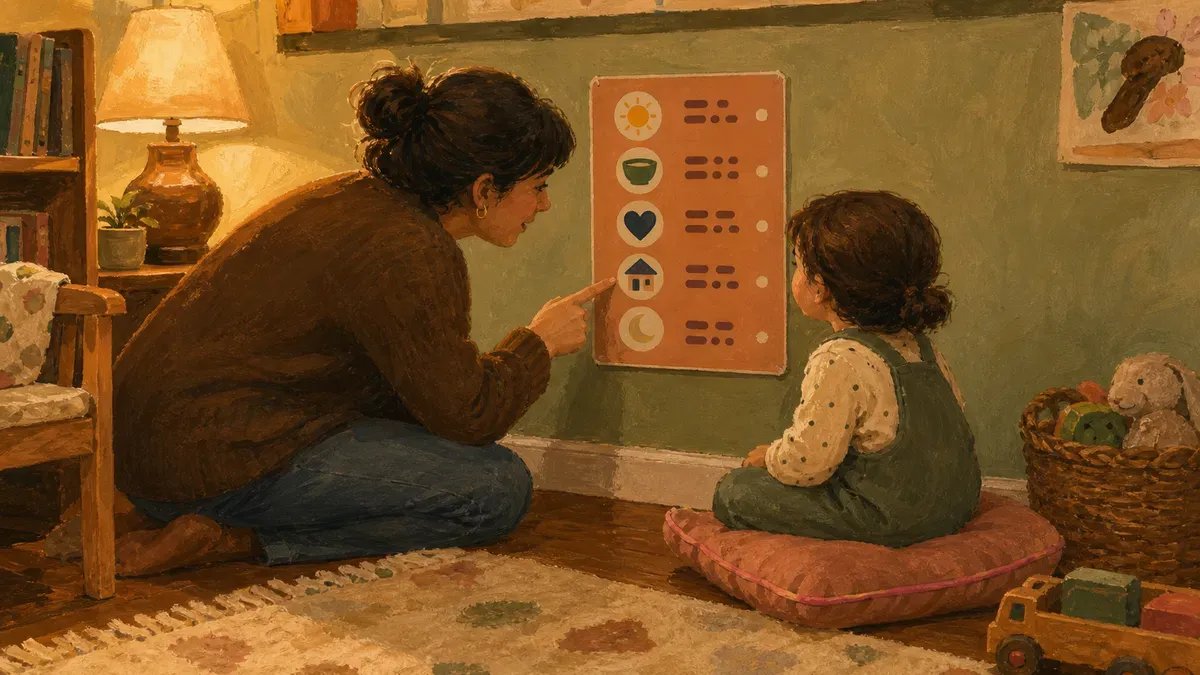
Hanging the Poster So a Child Can Reach It
A perfect poster mounted at adult eye level is a perfect poster nobody uses. Where it hangs and how it’s ordered decides whether a wound-up kid can actually read it, so let’s nail the height, the sequence, and the durability.
- Hang the poster where your child’s gaze lands when they’re sitting, not standing.
- Sequence the calming steps from check-in to exit, one direction only.
- Laminate it and use removable strips so you can swap strategies as your kid grows.
Find the Right Eye-Level Height
Here’s the part most people get backwards: a child in a calm down corner is almost never standing. They’re sitting, curled up, sometimes flat on a pillow. So measure to where they sit, not where they stand.
In a calming nook where kids sit or curl up, that usually puts the poster center somewhere between 30 and 40 inches from the floor. Sit your kid in the safe space, eyeball where their gaze rests, and put the center of the poster right there.
Classroom guidance from School Poster Printers puts elementary posters at 48 to 60 inches, but that’s for kids standing at a wall. Your corner is for a kid who has already melted into the floor. Go lower. If they have to crane their neck up, they won’t look at all.
Order the Instructions at the Calming Station
A poster reads like a path, not a menu. The whole point of the instructions at your calming station is that a kid follows them in order without you standing there narrating each one.
Sequence the steps the way we read: left to right, or top to bottom, first thing first. Autism Parenting Magazine recommends arranging visual schedule steps chronologically with clear, uncluttered images so a child can move through them on their own.
- Check-in first (name the feeling, breathe, whatever your opener is)
- Calming steps in the order you want them tried
- Exit cue last so they know when they’re done
Number the steps if your child can count, or use arrows if they can’t. It’s the difference between a tool and decoration.
Need a layout to copy? My 5 minute calm down corner walkthrough lays the visual supports out in the exact order that builds self-regulation.
Laminate and Mount to Survive Daily Use
Small hands will point at this poster, smack it, and occasionally try to peel it off the wall. Laminate every sign. School Poster Printers suggests 5 to 7 mil lamination for heavily handled classroom items, and a calming corner gets handled hard.
Mount it with something removable, Command Strips or Velcro, so you can rotate the content as your kid grows or swap a strategy that stopped working. These sensory tools shouldn’t be permanent.
Last thing: hang it where little hands can reach and point without yanking the whole sheet down. Touchable visual supports beat untouchable ones every time. A poster a kid can put their finger on is a poster a kid will use.
Using the Zones of Regulation on Your Poster
Color does the work text can’t. Pair the four Zones with the steps already on your sign and the poster stops being a list of feelings and starts being a map out of one. Here’s how that looks on the wall, and how to grow it past one kid.
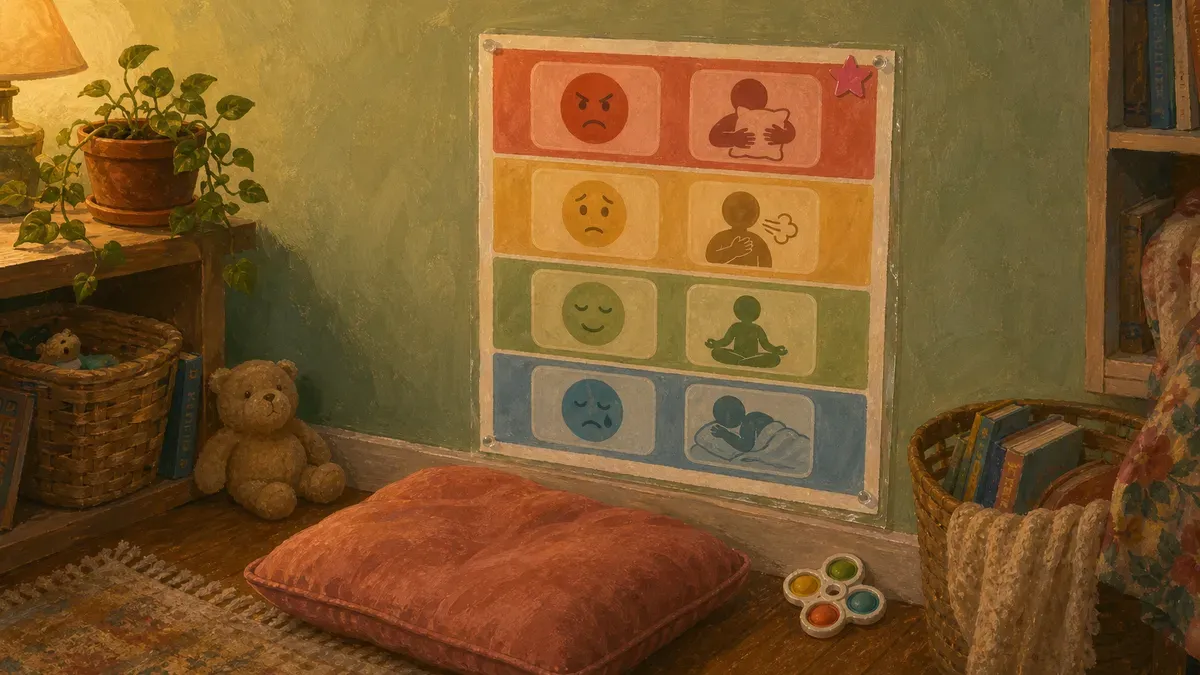
Match Each Zone to a Calming Strategy
Naming the feeling is only half of it. A kid who knows they’re “in the Red” still needs to know what to do about it, and that’s where the poster earns its spot. The Zones of Regulation, built by occupational therapist Leah Kuypers, sorts feelings into four color-coded zones and pairs each one with calming techniques and sensory supports a child pulls from their own toolbox, per the Zones of Regulation site.
So don’t just print the colors. Next to each zone, put one concrete move your kid can make standing right there:
- Blue (tired, sad, slow): a stretch, a sip of water, a hug
- Green (calm, ready): you’re good, carry on
- Yellow (wiggly, worried): three deep breaths, a squeeze of the pillow
- Red (angry, out of control): push the wall, count to ten, ask for space
That turns “I’m in the Yellow” into “I breathe.” If you want the full picture before you build it, here’s the zones of regulation explained for parents in plain language. A little positive self-talk on the card (“I can handle this”) gives a reading-ready kid a line to grab. The naming and the next action live side by side, which is the whole point of working on calm down corner emotional regulation this way.
Turn It Into a Bulletin Board Display
One sign handles one kid at the cozy spot. A classroom needs the bigger version. A zones of regulation bulletin board spreads the same four colors across a wall so a whole group can glance up, find their zone, and reach for a shared strategy without a word from you.
The Zones site notes the framework runs in all 50 states and 40-plus countries, and the classroom build is four zone posters with feelings descriptions and calming strategies students use for morning check-ins. That’s SEL doing double duty as quiet classroom management. Add a feelings thermometer beside the board and a clip with each kid’s name, and the morning check-in runs itself while you take attendance.
Choosing Posters by Age and Reading Level
What works for a kindergartner is too busy for a toddler and too simple for a third-grader. Age shapes how many steps, how much text, and how much choice a poster should carry.
Toddlers and Preschoolers: One Picture, One Word
A two-year-old in meltdown mode cannot read, and even a four-year-old who knows letters isn’t processing words when they’re dysregulated. What they can do is look at a picture and copy it.
For this age, calm corner signs work best when each step is one bold image with one word underneath.
- Breathe. A picture of a child blowing bubbles.
- Squeeze. A picture of a pillow.
- Three or four steps total, no more.
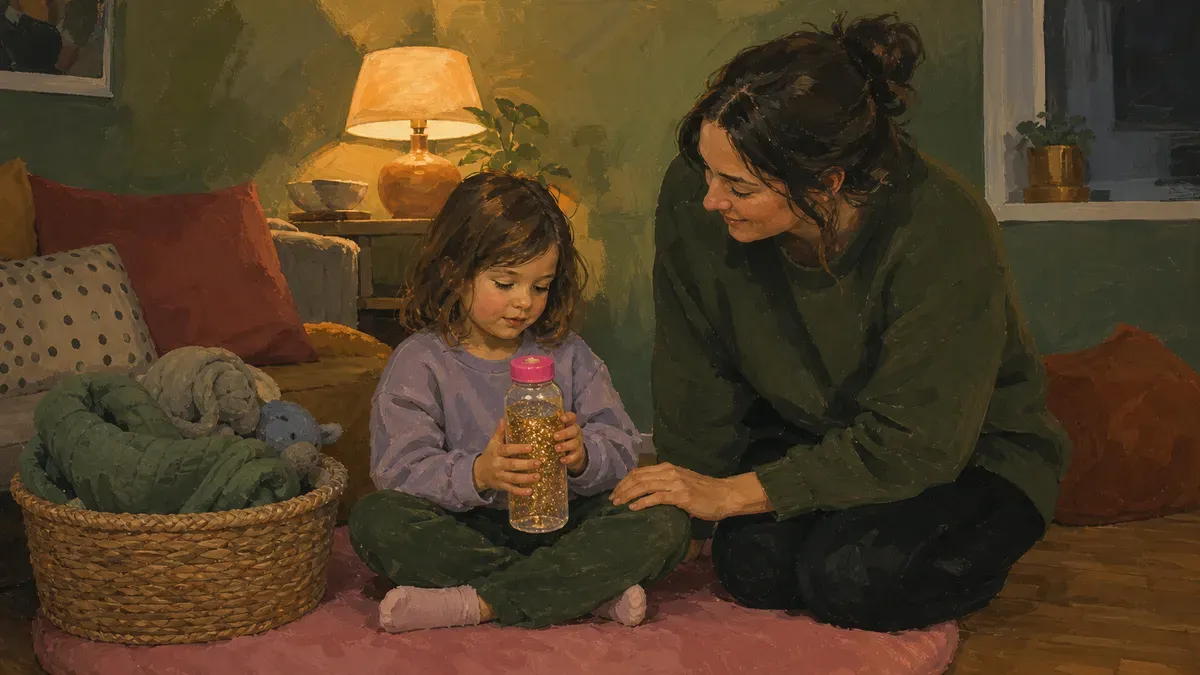
Rainbow breathing fits naturally here: the child traces the arc of a rainbow with their finger while they inhale and exhale. A glitter jar works the same way: watch it settle, breathe while you wait. Both double as feelings identification tools because the physical act interrupts the spiral before you name the emotion.
Guidance on social-emotional learning in children points to picture-led materials as particularly helpful for this age with anxiety. For layout ideas that actually hold a toddler’s attention, see the calm corner ideas for a cozy corner preschool.
School-Age Kids: Add Choice and Self-Talk
Kids who can read (roughly second grade and up) can handle options instead of a fixed path.
A coping skills menu works better than a numbered sequence at this age.
- Square breathing
- Drawing how you feel
- Ripping paper
- A short walk
- Squeezing something
Positive self-talk is worth its own line on the poster: a few short phrases they can say quietly, like “this feeling won’t last” or “I can handle this.” Add a self-reflection prompt at the bottom for after they’ve calmed: “What helped?”
Keep the format clean: clear font, not too many colors, breathing exercises labeled with their proper names so a teacher and a parent use the same language.
DIY vs Printable Calm Down Corner Posters
So do you buy one or make one? Both work, and the right answer comes down to whether you need it on the wall tonight or you’ve got a kid who’ll only use a poster they helped build.
Here’s how they compare at a glance:
| Printable | DIY | |
|---|---|---|
| Timeline | Up tonight | Takes extra time |
| Look | Designed and clean | Made by your kid |
| Words | Standard emotion labels | Your child’s own language |
| Use case | You need it now | Kid who has to own it |
When Free Printables Win
When you need it up today, a printable wins, full stop. You get clean icons, readable steps, and an emotions poster that looks like someone who knows fonts made it, all in the time it takes your printer to warm up. No drawing skills required, no Pinterest guilt about your stick figures.
Free sets for feelings, breathing, and calm-down steps turn up regularly, and most are easy to test before you laminate anything.
- Full-color and ink-saving versions of the same page are common, so you’re not burning a cartridge on a test print
- Grab a few options, print the one that fits your kid, laminate it
This is the move when you’re standing in the corner you just built and need calm down corner posters on the wall before bedtime, not next weekend. Reach for printable posters first any time you’re short on hours.
When Making Your Own Works Better
The catch with a store-bought sheet: it uses someone else’s words. If your kid says “my body’s too fast” and the poster says “frustrated,” that little gap becomes friction right when they’re least able to bridge it.
Making your own fixes that. Print blank coloring pages and let them color the calming moves, or sketch the whole thing together on the couch.
- Put your kid’s real calming moves on the poster: the beanbag, the squeeze pillow, whatever they actually reach for
- Cut anything they ignore in real life. A visual support only works when it shows moves they actually use.
When you set up a calm down corner at home, the homemade version is worth the extra time for the kid who needs to own it.
Teaching Kids to Use the Poster on Their Own
A poster that matches your family’s words is a good start. But knowing it’s there and actually reaching for it mid-meltdown are two different things. Both steps below need to happen before the hard moment arrives.
- Practice the poster together during a calm moment so the steps are already familiar.
- Refresh it every few weeks so kids keep noticing it.
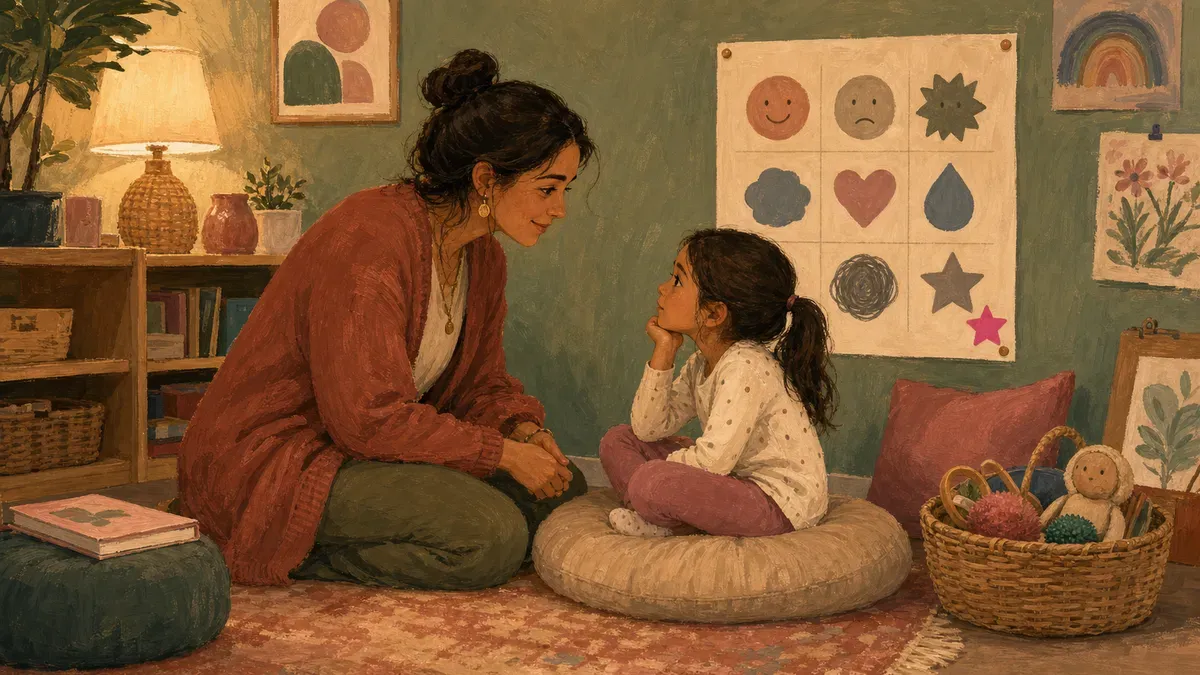
Practice the Poster When Everyone Is Calm
The biggest mistake is saving the poster for when everything is already falling apart. By then your child’s brain is flooded, and introducing a new routine is off the table.
Sit at the safe space on a quiet afternoon and walk through it step by step:
- Point to each step and narrate out loud: “First we check in with our feelings. Then we pick something that helps.”
- Let them point to the pictures too.
- Have them name what they see on each card.
That five-minute run-through is co-regulation in action: you’re calm, they’re calm, and the path gets laid down before it’s needed.
After that, when a hard feeling shows up, the poster is already familiar ground, not a new instruction to decode. For the full setup behind this practice, see our full guide to building a calm down corner.
Refresh the Poster So It Stays Noticed
After a few weeks, the poster becomes part of the wall. Kids stop seeing it, the same way they stop seeing the clock.
Every few weeks, swap one strategy, add a new image, or flip the step order. Let your child pick what goes on next. That small change keeps self-regulation active rather than invisible.
For low-cost calm corner ideas that rotate easily, printable sets help because you can swap a single page without rebuilding the whole safe space. When the child helps choose what stays, the corner stays theirs.
Found this useful? Save it for the next rough afternoon.
Questions parents ask me about this
What should a calm down corner poster include for kids?
The most useful posters have a feelings check-in at the top, three to five calming steps in order with icons, and a clear exit cue so the child knows when they can leave the corner. An emotions reference and a simple breathing visual round it out. Keep the steps sequential, left to right or top to bottom, so the child has one clear path to follow rather than a scattered menu.
What size should a calm down corner poster be?
A single 8.5 x 11 sheet works fine for a home corner. The more important measurement is height off the floor: hang the poster so its bottom sits near your child's eye level when seated, which for most kids means 30 to 40 inches from the floor. A poster hung at adult height is invisible to a dysregulated four-year-old.
How high should you hang a calm corner sign for toddlers?
For most toddlers and preschoolers, that lands somewhere between 30 and 40 inches up the wall. The practical test is to have your child sit in their usual spot in the corner and see where their eyes land naturally, then hang the poster there. Toddlers and preschoolers also do better when they can touch and point to the steps, so reachable matters as much as visible.
Are free printable calm down corner posters good enough?
For most families, yes. Free sets covering feelings visuals and basic breathing steps handle the core functions well. The trade-off is customization: a free poster uses someone else's words, while a paid or DIY version can match exactly what your family already calls things. Start free, and upgrade only if your child isn't connecting with the language on the page.
How do you keep posters from getting torn or ignored?
Laminate with a 5 to 7 mil pouch so it holds up to sticky hands and the occasional frustrated grab. For the ignored problem, the fix is practice: walk through the poster together during a calm moment, well before a hard feeling hits. Rotating a strategy or two every few weeks and letting your child pick what stays keeps the corner feeling current rather than invisible wallpaper.
Do calm down corner posters work for non-verbal kids?
Yes, often more effectively than text-heavy versions. Non-verbal and minimally verbal kids rely on visual supports more heavily, so a poster built around large icons and minimal words can be easier to process under stress than one requiring reading. For toddlers and non-readers, one image paired with one simple word per step is the right format. A glitter jar or breathing card alongside the poster gives them a concrete tool to match each step they see.
Written by
Nora Hayes
Mom of two and a former preschool aide. I share the screen-free sensory play and calm-down ideas I test at my own kitchen table, plus what the moms in my little meet-up swear by. A parent passing on what works, not a doctor or a therapist.
More about NoraKeep going
All Calm & Big Feelings-
 Calm & Big Feelings
Emotional Regulation Activities for Kids That Work
Most calming tricks fail mid-meltdown. These emotional regulation activities for kids work when nothing else does. Find the one that fits your child.
-
 Calm & Big Feelings
Calm Corner Ideas: 25 Picks Under Your Coffee Budget
Skip the $200 setups. These 25 calm corner ideas cost less than a latte and soothe big feelings. Build one your kid loves this week.
-
 Calm & Big Feelings
Calming Center Checklist: What Actually Belongs
Most calming center stuff just becomes clutter. Here's the exact checklist of tools that actually help kids regulate. See what to keep.
-
 Calm & Big Feelings
Social and Emotional Learning Curriculum in the IEP
Most IEPs skip the one accommodation that stops meltdowns. See how a social and emotional learning curriculum gets a calm-down corner written in.